Showing posts with label sweets. Show all posts

Monday, January 22, 2024

Marzipan Loaf Cake


Seasonal Recipe of the Week
There is something about certain food words that make them extra special. I have gone on for years about how much sexier tangerine is than orange. Drizzle is way more upscale than drip. There is nothing I can do with foam, but put a a savory marmalade on my plate and I am in. I feel this way about marzipan, much cooler than almond paste.

Which brings me to the cake I just pulled from the oven. I was wandering about LIDL, my local weird supermarket which I have a love/hate relationship with. They are a European chain and often have unusual products littered randomly throughout the store. Things I don't really think anyone on Long Island wants or needs, like pickled Greek Octopus salad (rubbery and inedible) to the bar of marzipan I found today which was 40% off, a leftover from Christmas. Fortunately this stuff is almost indestructible.

Recently I had read a Nigella recipe for a marzipan loaf which sounded like it needed trying. Here it is, unchanged from original, though now I'm thinking adding chocolate chips would be divine!

Note: this is a British recipe so it's in grams, get out those scales!

Ingredients
150 grams marzipan
125 grams unsalted butter, room temperature
1 teaspoon vanilla extract
50 grams granulated sugar
75 grams all purpose flour
1/4 teaspoon sea salt
1 teaspoon baking powder
1 1/2 teaspoons ground cardamom
3 large eggs, room temperature

Procedure
Heat oven to 325. Spray and line a loaf pan with parchment and spray parchment.

Tear up the marzipan into small pieces and put in food processor, then add everything else and run till batter is smooth. Stop twice to scape down sides of the bowl. Scrape batter into prepared pan and bake for 40 minutes, or until the top is golden, it springs back, and a toothpick inserted comes out clean. Freezes well.

Sunday, July 16, 2023

Mandarin Orange (or Clementine) Cake


Seasonal Recipe of the Week
Last weekend, we were at the Jersey Shore hanging out with my husband's college buddies. What did we do there? A little beach time, some boardwalk-ing. Lots of eating, drinking, and discussing the end of America as we know it — which led to more drinking and eating. Everyone brought food and beverages and our lovely hosts made it all work together seamlessly into a splendid holiday.

One of the things I tried for the first time, was an orange-flavored cake with only 5 ingredients, by Nigella Lawson. But of course I ended up putting my own spin on it. The recipe calls for almond flour — it's naturally gluten-free! — but I didn't have any almond flour, so instead I used a combo of half Bob's Red Mill hazelnut flour and half grain-free paleo flour. The recipe is also dairy-free. And, lastly, I switched out the sugar for Erythritol (alternative sweetener sold under the brand name Swerve) so I could eat it.

You can do an optional glaze using lemon or orange juice and confectioners sugar, but I think it's intense enough as it is. Perhaps a chocolate drizzle is in order? Other changes I made to original recipe were the inclusion of ground coriander, cinnamon, and mace. The original recipe said to use a springform pan, but I opted for a parchment-lined square pyrex dish and it cooked perfectly. I left the edges of the parchment paper tall so I could use it to lift the cake out of the pan. Here is my recipe, but please note this can be experimented with and certainly improved. Say ... with the always sexy tangerine, or lemon or lime or grapefruit. Note: the amount of sugar you use will need to be adjusted depending on the citrus.

Ingredients
5 whole mandarin or clementine oranges (total 375 grams)
220 grams Swerve granular sugar substitute
6 large eggs
1 teaspoon baking powder
125 grams hazelnut flour
125 grams Paleo grain free flour
1/4 teaspoon mace (you can substitute nutmeg)
1/4 teaspoon cinnamon
1/4 teaspoon coriander

Procedure
Put the oranges in a pot, cover with water, partially cover, bring to a boil, and simmer for two hours. Keep an eye on it, as the water has a tendency to boil off. Drain and let cool. Cut the oranges in half and remove any seeds. Spray a glass pan with baking spray, line with parchment, spray again, and set aside. Preheat oven to 375.

Place the oranges into a food processor fitted with the steel blade, and pulse till you have a purée, then add everything else. Scrape batter into pan and bake 1 hour. Let cool 10 minutes in pan before lifting out. It's better the next day — but who can wait? I'm thinking a little salted caramel ice cream on top might be fabulous.

Saturday, June 24, 2023

Applewood smoked salt butter cookies

Seasonal Recipe of the Week
It’s finally summer! And now my attention turns to my garden. This year things seem to be growing well—unlike last season's failure. Perhaps it’s due to my online soil research, or maybe it’s my new friendship with the neighbor up the street who is a biologist and a farmer. He tested my soil and recommended specific supplements and it worked! Nitrogen and potassium were low, but now everything is happy. In addition to gardening, I try and get out and try new things. I started bouncing on the rebounder (also known as a mini trampoline) daily. A friend recommended it, and it’s a really fun way to exercise! I started drinking a super green supplement and drinking mushroom tea. Perhaps I am losing my mind, maybe I am trying to maintain what’s left of my youth, but I feel great. What does this have to do with baking cookies? Nothing. Just wanted to update you! What's new with you?

So ... basic butter cookies. This is the cookie you make when you have nothing in the pantry. And then you remember how delish butter, sugar, and flour can be. I always keep extra butter in the freezer, always have eggs, sugar, flour, and vanilla. These cookies are delicious just as is. But with slight modifications, you can take this cookie in many different directions. My Pittsburgh friend gifted me some beautiful smoked salt, which was amazing! But you have so many options: sesame seeds; toasted coconut; almond extract and slivered almonds on top; chocolate drizzle after baking with a shaved chocolate garnish; finely diced fresh herbs (rosemary, thyme, basil, or dill) for a savory twist; or you can go old-school and stick an M&M in the center. Get creative!

Ingredients
1 cup (226g) unsalted butter, softened
2/3 cup (140g) granulated sugar
1/4 teaspoon salt
2 large, room temperature egg yolks
1 1/2 teaspoons vanilla extract
2 cups (283g) all-purpose flour (scoop and level to measure)
2 to 4 teaspoons milk
Sprinkling of smoked salt (mine was from the Spice & Tea Exchange in Pittsburgh)

Procedure
Preheat oven to 350 degrees. In the bowl of an electric stand mixer fitted with the paddle attachment, cream together butter, sugar, and salt until combined. Mix in egg yolks and vanilla. Add flour and mix until crumbly then add in 2 teaspoons of milk, if needed add in another 1 to 2 teaspoons more of the milk for a more pipe-able consistency - add as little as possible for less spreading, though. Transfer to a 16-inch piping bag fitted with a very large open star tip. Make stars or circles onto two ungreased baking sheets. Just to be clear, this might not be easy. The dough is thick. You can add extra water to make it easier to pipe, but the more liquid you add, the more the dough will spread. Sprinkle a few flakes of smoked salt on top of each cookie. Bake in preheated oven until golden brown on bottom, about 12 to 16 minutes. Let cool on baking sheet for 5 minutes then transfer to a wire rack to cool completely. Store in an airtight container, or just eat them all.

Wednesday, December 07, 2022

Apple Cider Caramels

Seasonal Recipe of the Week
I'm BAACCKK! Thanks to Monica the site is alive and I am ready to party!

Apple cider caramels are magic! I have never been a candy maker so I was hesitant at first, but this recipe from King Arthur Flour and Smitten Kitchen works perfectly — if you follow the instructions exactly and make sure your thermometer is accurate. I am including it in all my Christmas baskets this year. You can make them up to 2 weeks in advance, just don't eat them all!


Ingredients
4 cups (945 ml) real unpasturized apple cider
1/2 teaspoon ground cinnamon
2 teaspoons smoked flaky Maldon sea salt
1 stick unsalted butter, cut into chunks
1 cup (200 grams) granulated sugar
1/2 cup (110 grams) packed light brown sugar
1/3 cup (80 ml) heavy cream
Neutral spray oil for the knife

Procedure
Boil the apple cider in a 3- to 4-quart saucepan over high heat until it is reduced to a dark, thick syrup, between 1/3 and 1/2 cup in volume. This takes about 35 to 40 minutes. Stir occasionally and skim off the foam. To be sure you have the correct amount of reduction, measure it into a measuring cup then pour it back into the big pot.

Meanwhile, get your other ingredients in order — it's always best to be prepared, especially when working with sugar! Line the bottom and sides of an 8-inch straight-sided square metal baking pan with parchment. Set it aside. Stir the cinnamon and flaky salt together in a small dish.

Once you are finished reducing the apple cider, remove it from the heat and stir in the butter, sugars, and heavy cream. Return the pot to medium-high heat with a candy thermometer attached to the side, and let it boil until the thermometer reads 252 degrees, only about 5 minutes. Keep a close eye on it.

Immediately remove caramel from heat, add the cinnamon and salt mixture, and give the caramel several stirs to distribute it evenly. Pour caramel into the prepared pan. Let it sit until cool and firm — about 2 hours, though it goes faster in the fridge. Once caramel is firm, grab your parchment paper to transfer the block to a cutting board. Use a well- oiled knife, oiling it after each cut (trust me!),and cut the caramel into 1-by-1-inch squares. Wrap each one in a 4-inch square of waxed paper, or buy precut sheets of acetate candy wrappers, twisting the sides to close. Caramels will be somewhat on the soft side at room temperature, and chewy/firm from the fridge.

⚠️ WARNING! ⚠️ Making candy like this at high altitude might be a nightmare. Sugar does weird things sometimes, so no guarantees to my Santa Fe buddies! If you do try it at high altitude and this recipe worked for you (or failed spectacularly), leave a comment and tell us all about it! Or, if you just need these in your life, text me and I will send you some!

Wednesday, October 06, 2021

Flourless Chocolate Hazelnut Torte

Seasonal Recipe of The (maybe soon-to-be-over?) Pandemic
I find that some flourless chocolate cake recipes can be a bit persnickety and the results often disappoint me. They can be too dense or the texture ends up grainy or mushy. This recipe avoids all those pitfalls and I swear it comes out perfectly every time! It's a good jewish holiday recipe as well as a great make-ahead dessert. If you want to WOW your guests, give this one a try. For garnish, I like some berries and a light sprinkle of confectioner's sugar, but some bourbon whipped cream never hurt anyone!

Ingredients
12 ounces 60% cacao bittersweet chocolate, chopped
3/4 cup (1 1/2 sticks) unsalted butter, cut into chunks
6 large eggs
1 cup (packed) brown sugar
1/4 cup Frangelico
1 cup finely ground hazelnut flour
1 teaspoon coarse kosher salt
1 teaspoon espresso powder

Procedure
Position rack in center of oven and preheat to 350°F. Spray a 9-inch diameter springform pan. Wrap outside of pan tightly with 3 layers of heavy-duty foil.

Combine chocolate and butter in medium metal bowl; set bowl over saucepan of simmering water. Whisk until mixture is melted and smooth. Remove bowl from over water. Whisk eggs, golden brown sugar, and Frangelico in large bowl to blend. Add chocolate mixture and whisk until smooth. Stir in ground hazelnuts and 1 teaspoon coarse kosher salt and espresso powder. Transfer batter to prepared pan and tent loosely with foil.

Place springform pan in large roasting pan. Pour enough hot water into the roasting pan to come halfway up side of the springform. Place in oven and bake until cake is set in the center and the top is dry to touch, about 1 hour to 70 minutes (top of cake will remain shiny). Remove cake from roasting pan; remove foil from top and outside of pan. Cool cake in pan on rack. Chill cake until cold, about 3 hours. Remove from springform before serving.

Can be made 3 days ahead. Cover and keep chilled.

Saturday, April 10, 2021

Keto?? Yes, I fell down that rabbit hole and it’s working for me!

Seasonal Diet of the Pandemic
Controlling my weight as a chef and a baker — and basically someone who just loves all food — has always been a challenge. My usual procedure is work really hard on some kind of quick weight loss plan (never lasts) or a plan like Weight Watchers (the best, most sustainable program out there), lose the 20 pounds, keep it off for about 2 years, and then get bored of all the accountability, lose the plot, and then before I know it I'm eating chocolate chip cookies and I am doomed. Sugar is my crack and almost as addictive.

I have learned I am better with a plan that has strict rules and suggested menus to follow. I love a challenge, and I like to develop recipes to meet whatever crazy palette of ingredients I am currently allowed. So the keto diet has been my pandemic challenge. It's not easy to follow. To do it right, I have to monitor the macros of everything I eat (I use the free version of My Fitness Pal) to get the right percentage of fat (massive amounts of fat), protein, and carbs (the new enemy) as well as testing my blood and glucose to see if I have successfully reached ketosis — which is when your body burns fat and weight starts to disappear. Fat is now my friend, which is so weird!

If you are interested, there is a huge amount of info on the web as well as some great books I'll list at the end of this post.

After almost 4 months, I am down 15 pounds and at my goal weight. Anyone who has ever had a weight issue knows the really hard work is keeping it off. But I am going to keep my expectations realistic and not beat myself up. One of my favorite parts of this challenge has been all the discoveries that taught me new ways to use ingredients to create some of the foods I no longer eat — like bread!

I would like to share 3 recipes which are delicious, nutritious and kind of cool: hearts of palm bread (GF); celery root, butternut squash, and bacon rösti; and mocha mousse. They are all Keto, so remember they are high in fat and calories but low in protein and carbs. The orgiginal recipe sources are linked, but I've made a number of changes in some of these recipes.

Celery Root, Butternut Squash, Bacon and Parmesan Rösti

Adapted from Simply Keto by Suzanne Ryan

Ingredients
2 slices sugar-free bacon, cut into small pieces
1 cup shredded raw celery root
1/2 cup shredded raw butternut squash
1 shallot
1 teaspoon chopped fresh parsley
2 tablespoon grated Parmesan cheese
1/2 teaspoon kosher salt
1/4 teaspoon ground black pepper
1 clove fresh crushed garlic
1 egg

Procedure
In a 10 inch sauté pan, cook the bacon until mostly crisp. Remove bacon and save the fat. While the bacon cooks, combine the shredded celery root, parsley, Parmesan cheese, salt, pepper, garlic, and egg and mix well. Put 2 tablespoons bacon fat back into the sauté pan. Add the celeriac mixture to the pan with the cooked bacon in it and stir well. With the back of a large spoon, press the mixture into the bottom of the pan to form a round cake.

Cook on medium heat for about 5 minutes or until the bottom is dark golden brown and crisp, and the top is softened. Put into 375 oven for 15 minutes. Carefully place a serving plate over your pan and flip the cake onto it crispy side up. Serve it hot, garnished with more parsley if you like.

Hearts of Palm Bread

Adapted from I Breathe I'm Hungry by Mellissa Sevigny

Ingredients
1 (14 ounce) can of hearts of palm, well drained (equals about 8 ounces drained weight, or 1 1/2 cups sliced)
3 large eggs
2 tablespoons olive oil
1/2 cup warm water
2 cups super-fine blanched almond flour
2/3 cup coconut flour
3 tablespoons psyllium husk powder
4 teaspoons baking powder
1/2 teaspoon fine salt (sea salt or Himalayan salt preferred)

Procedure

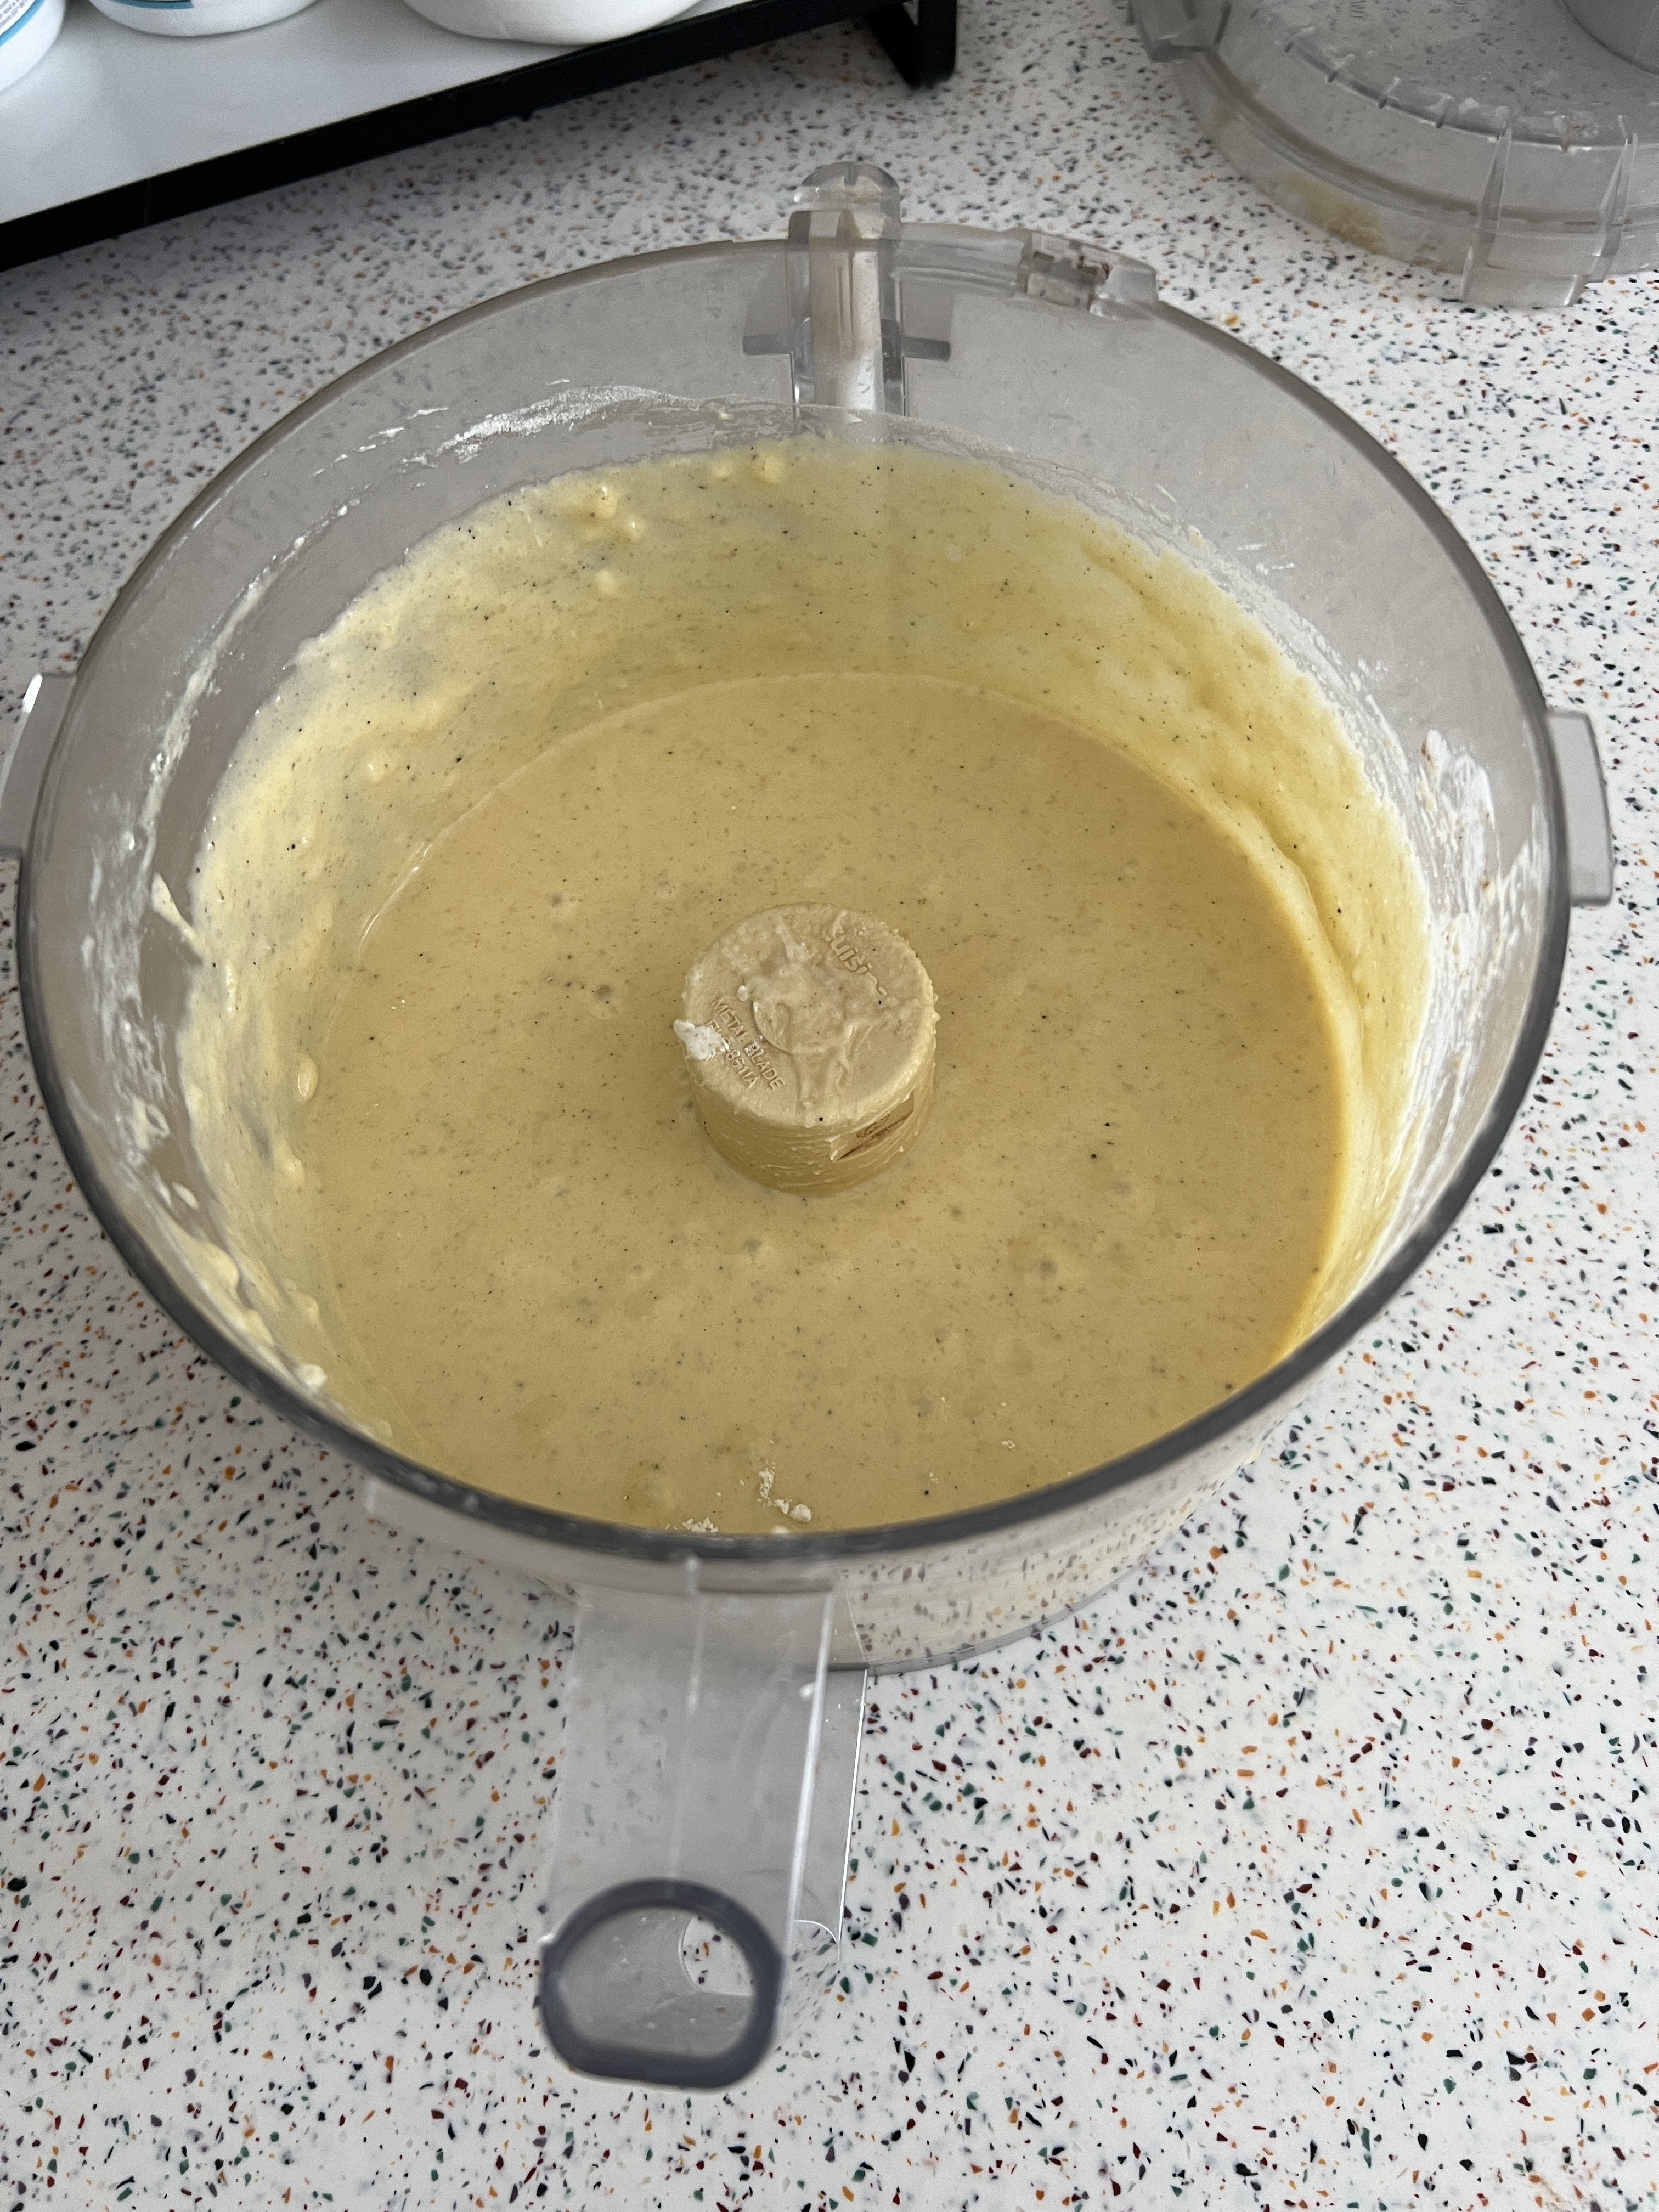
Preheat oven to 375 degrees. Line a 9.5 inch loaf pan with parchment paper. Combine the hearts of palm, eggs, olive oil, and water in a blender, and blend until smooth. Pour into the mixing bowl of your stand mixer. Add the almond flour, coconut flour, psyllium husk powder, baking powder and salt.

Mix with a dough hook on low to medium for 1 to 2 minutes or until a dough is formed. If you don’t have a stand mixer, mix by hand with a sturdy spoon for several minutes, then knead by hand for a minute or two, until you have a well-blended and uniform-looking dough.

Form into a loaf about 8 inches long by 3 inches wide and 3 inches high, and place in the parchment-lined loaf pan. Bake for 70 minutes, or until the top is golden brown and the bread has risen by about 1 inch.

Remove from the oven and carefully lift the loaf out of the pan by the edges of the parchment paper. Place the loaf (without the parchment paper) on a wire rack too cool. This will keep it from getting soggy on the bottom, and will allow any moisture to evaporate as steam. Cool for at least 30 minutes before slicing. Store the bread in an airtight container in the refrigerator for up to 1 week, or in the freezer for up to 6 months.

Note: most forms of Psyllium husk will turn your bread a slight purple grey. This does not affect flavor, but the recipe creator recommends Healthworks brand because it never turns her baked goods purple.

Mocha Mousse

Adapted from from Ruled.Me

Ingredients
8 ounces cream cheese, softened
3 tablespoons sour cream
2 tablespoons butter, softened
1 1/2 teaspoons vanilla extract
1/3 cup granulated Swerve
1/4 cup unsweetened cocoa powder
2 teaspoons instant coffee powder
2/3 cup heavy whipping cream
1 1/2 teaspoons granulated Swerve

Procedure
In a medium bowl, beat cream cheese, sour cream, and butter with an electric mixer until smooth. Next, blend in the vanilla extract, Swerve, cocoa powder, and coffee powder until incorporated and set aside.

In a separate bowl, beat whipping cream until soft peaks form. Add Swerve and beat a bit more. Fold 1/3 of the whipped cream mixture into the cream cheese mixture to lighten it. Be sure to not deflate the bubbles. Fold in the remaining 2/3 of the mixture until the whipped cream is evenly incorporated.

Transfer the mousse into 6 8-ounce ramekins and refrigerate until set, then just eat it all.

some more keto resources:

Sunday, October 18, 2020

Dark Chocolate, Pretzel, and Bourbon Truffles

Seasonal Recipe of the Pandemic
Are you sick of staying at home? Are you tired of eating the same stuff—which you have to make yourself? Is your partner and your "pod" driving you crazy? Well then, I say it's time to eat chocolate! These are super easy to make and even easier to eat. This recipe makes a lot of truffles (about 30) you can share them, or freeze some, or to hell with it, eat them all!

Note: this recipe is mostly in grams, I am trying to do all my baking and candy-making by weight as much as possible now. It's so much more accurate. If you don't already have one, get yourself a digital kitchen scale. You can find good ones on Amazon for like $20, add one to your next order! You will thank me later, I hope.

Ingredients for truffles
90 grams light cream
300 g dark chocolate, finely chopped
100g store-bought pretzels, crushed in food processor
1/4 teaspoon Maldon salt flakes
40 ml bourbon

Ingredients for bourbon sugar
1/2 cup Demerara sugar (or turbinado sugar)
1 tablespoon bourbon
1 tablespoon unsweetened cocoa powder

Procedure
Place the cream and chocolate in a small bowl over simmering water and stir until melted. Then add bourbon, salt and pretzels and mix well to combine. Allow to stand at room temperature for 10 minutes. Then refrigerate for 2–3 hours or until set.

While the mixture is cooling, make the bourbon sugar. Preheat oven to 325°F. Line a large baking tray with parchment or a Silpat. Place the sugar and bourbon in a small bowl and mix to combine. Spread in an even layer on the tray and bake for 30 minutes or until golden and crisp. Allow to cool completely before crushing into fine crumbs, then add cocoa powder.

Scoop the truffle mixture into 1-teaspoon balls and toss in the bourbon cocoa sugar to coat. Place the truffles on the tray and refrigerate for 30 minutes or until firm. Bring to room temperature before devouring!

Saturday, August 29, 2020

Almond Breakfast Bread (for folks with severe dietary limitations)

Seasonal Recipe of the Pandemic
I have a fantastic job cooking for a wonderful family and the Mom has quite a few restrictions on what she can eat, but loves food and trying new things. This keeps me on my toes and constantly experimenting. I am now working with a new palette of ingredients which include alternative sugars, dairy substitutes, no legumes, and gluten-free options. Learning how they interact and trying to make things taste good while staying within my new framework is a fun problem. Breads and baked sweets are particularly challenging. We have all had plenty of heavy, gummy or super dry and gritty desserts! This breakfast bread is a winner and I am currently working on variations which I will list at the bottom of the recipe.

Ingredients
3 eggs
3/4 cup almond butter
6 tablespoons agave syrup
1/2 cup non-dairy sour cream
3 drops Boyajian's orange oil
3 Tablespoons Earth first butter (non-soy)
1 Tablespoon Yuzu or lemon juice
1 teaspoon almond extract
1/4 teaspoon salt
1/2 teaspoon cinnamon
1/2 cup arrowroot
2 teaspoons baking powder

Procedure
Put everything but the arrowroot and baking powder in blender (I use a Vitamix) and blend 30 seconds. Then add dry ingredients and blend until smooth. Scrape down the sides with a spatula to make sure everything mixes. Bake at 350 degrees for 50 minutes in a spray-greased loaf pan. Test with a toothpick to see if it's done.

Notes
I use the Vitamix because I don't have a stand mixer at work, but a mixer would be great. I am now experimenting with other nut butters like hazelnut chocolate butter (Nutella basically, but with more body) tahini, peanut butter, and cashew butter. Extracts like coffee, maple, and mint are also a great way to alter the flavor. Boyajian oils are fun to play with because they add an intense pure shot of citrus without thinning the batter. You can also fold in nuts or fresh berries or dried fruit.

Tuesday, July 07, 2020

Grapefruit Campari Sorbet

Seasonal Recipe of the Pandemic
It's hot, it's humid, there are gross bugs crawling on me when I step outside, it's unsafe to go to the beach, or eat out, so basically all that's left to do is eat. I love making sorbets with the season's fresh fruits and any delicious combinations I can come up with. This one uses the great Italian aperitif Campari, plus pink grapefruit juice, how can you go wrong? It's so simple and so refreshing!


Ingredients
3 cups fresh squeezed pink grapefruit juice (about 6 grapefruits)
3/4 cup sugar
1/4 cup Campari

Procedure
Warm 1 cup of grapefruit juice with the sugar over low heat until the sugar dissolves. Then mix in the rest of the juice and the Campari. Chill mixture thoroughly then process in your ice cream machine if you have one. If you don't, freeze mixture in shallow tray till firm, then break it up with a knife, buzz up the chunks in a food processor, and refreeze.

Saturday, May 02, 2020

Ebinger’s Blackout Cake

Seasonal Recipe of the Pandemic
What birthday gift do you get for the woman (my mother Bernice) who has everything she needs? Chocolate. Not just any chocolate, a legendary dark rich chocolate cake encrusted in moist cake crumbs, filled with chocolate pudding and topped with a bittersweet ganache made richer by the addition of espresso powder. Originally from Ebinger's of Brooklyn, this is a copy at recipe which is floating around online, and — as far as I can remember — it’s spot on.


Ingredients for filling
1 cup semi-sweet chocolate chips
1/8 teaspoon salt
2 tablespoons sugar
1/2 teaspoon espresso powder
1 large egg, room temperature
1 cup heavy cream

Ingredients for cake
2 cups sugar
2 cups AP flour
2 tablespoons cornstarch
3/4 cup (2 1/4 ounces) Dutch-process cocoa
2 teaspoons baking powder
1/2 teaspoon baking soda
1 teaspoon salt
1 teaspoon espresso powder
4 large eggs
3/4 cup vegetable oil
2 teaspoons vanilla extract
1 1/4 cups water

Ingredients for icing
1 1/2 cups chocolate chips
3/4 cup heavy cream

Procedure
You start with the filling because it needs to set up for a few hours — you can evan make it the day before. Place the chocolate chips, salt, sugar, and espresso powder in a food processor fitted with the big blade and pulse until finely ground. Add the egg and pulse just until the mixture is smooth. Heat the cream to just below a boil, with small bubbles forming around the edge of the saucepan. Turn on the processor, and slowly add the cream. Scrape down the sides of the container if necessary. Pour the pudding into a shallow bowl, and refrigerate it until chilled and thickened, 2 hours to overnight.

When you’re ready to bake the cake, preheat the oven to 350°F. Lightly grease two 8" x 2" round cake pans. Line them with 8" parchment circles, and grease the parchment; this step will ensure your cake’s crumble-free turnout from the pan. Whisk together the dry ingredients. Add the eggs, oil, and vanilla. Beat on medium speed for 2 minutes, scraping the bottom and sides of the bowl. Stir in the water and mix till smooth. Pour the batter into the two prepared pans. Bake the cakes for 35 to 45 minutes, or until a toothpick inserted into the center comes out clean. Remove the cakes from the oven, cool for 15 minutes, then turn them out of the pans to cool completely on a rack.

To make the icing, combine the cream and chocolate in a saucepan. Heat until the cream is steaming and showing small bubbles around the edge. Remove the chocolate/cream from the burner, and stir until the chocolate is melted and the mixture becomes completely smooth. Refrigerate the ganache for 30 minutes. Beat the chilled icing briefly, until it thickens a bit and becomes spreadable.

To assemble the cake, cut the domed tops off both cake layers; these will become your crumb coating. Place one layer on a serving plate. For best presentation, lay strips of parchment around the edge of the plate before putting the cake on top; these will catch the inevitable icing drips, and can be removed once you're done icing the cake. Top the cake with the filling, spreading it evenly to the edges. Center the second layer of cake on top of the filling. Spread the icing over the top and onto the sides of the cake. Crumble the reserved cake, and gently press it onto the top and sides of the assembled cake. Serve immediately, or within a couple of hours. For longer storage, refrigerate. This cake is best served the same day it’s made, or within 24 hours. Freeze, well-wrapped, for longer storage. My mother eats hers with a scoop of Häagen-Dazs chocolate ice cream — hardcore!

Sunday, March 22, 2020

Meyer Lemon and Honey Jam — and the end of the world as we know it

Seasonal Recipe of the Week
Greetings my fellow shut-ins! Wow, how life has changed since I wrote this post! I forgot about it, ate the jam already, and then just now I was going to write an inspirational post and this popped up in my drafts column. So I will post this now, and I will keep working on my next post which will be full of great ideas for bored, stressed people (my people!), fun DIY projects, and bad humor. Something to look forward to … in the meantime, wash your hands!

And now let's pretend life is normal.

It's Meyer lemon time! They just showed up in my regular old supermarket, so I figured I better get some and do something cool with them. Found this recipe for jam which is made with the whole lemon, pith and all (which sounded good to me). Then I added some great honey and a pinch of salt and ba-da-bing — a condiment with so many possibilities! From glazing grilled chicken, to a fantastic burst of flavor in my vinaigrette, it's even delicious in yogurt and blueberries — give it try!


Ingredients
1 1/2 pounds Meyer lemons
2 1/2 cups water
1/2 teaspoon salt
2 cups honey

Procedure
Wash the lemons and place them in a saucepan that can hold them in a single layer. Cover lemons with water and bring to a boil. Once the water is bubbling, reduce the heat to medium-low and simmer the lemons for 25 minutes, until the skins are tender but still hold together. Remove the pot from the heat and let the lemons cool completely in the cooking water.

Place the whole lemons in a blender and add two cups of the cooking water. Blend at low speed to break up the lemons. Take care not to purée them entirely smooth.

Pour the lemon mix into a low, wide pan and add two cups of honey and bring to a boil over high heat and reduce to medium-high. Cook, stirring regularly, until the jam thickens and sheets off the back of your spoon or spatula. You can tell it's nearly done when it hisses and spits when you stir. My batch took about 15 minutes, but times will vary.

When jam is finished cooking, remove pot from heat. Put jam into prepared jars. Wipe rims, apply lids and rings, and process in a boiling water bath canner for ten minutes. When time is up, remove jars from canner and let them cool.

Tuesday, October 22, 2019

Cranberry-Orange Crumb Cake

Autumnal  Recipe of the Week
I have a fussy friend who doesn't like many things, but she loves cranberry and orange together! So I have been collecting recipes for her, and I think this one is a winner. I feel like it's more of a breakfast treat then a dessert, but who am I to stop you from eating it all day? Whenever I see a recipe with sour cream in the batter I know it will have a moist and delicious texture, which this does. And the crumb topping is really really yummy. The drizzle is optional but why not, just wait for the cake to cool or it will disappear into the crumble (see photo).


Ingredients for crumb topping
1 cup all-purpose flour
1/4 cup sugar
1/3 cup dark brown sugar
1 tsp. cinnamon
1/4 teaspoon salt
3.5 ounces (7 Tablespoons) unsalted butter, melted

Ingredients for cranberry-orange cake
5 ounces unsalted butter, room temperature
1 cup sugar
zest of 1 orange
2 eggs room temp
1 teaspoon vanilla extract
8 ounces full fat sour cream
1 1/2 cups all-purpose flour
1 1/4 teaspoon baking powder
1/4 teaspoon baking soda
1/2 teaspoon salt
1 cup fresh or frozen cranberries
1/4 cup dried cranberries soaked in 1/2 cup rum then drained (or just drink it!)

Ingredients for orange glaze
1/2 cup powdered sugar
1 tablespoon orange liqueur

Procedure
Crumb topping In a medium-size bowl, mix together flour, sugar, brown sugar, cinnamon, and salt. Add melted butter and mix together with fingers so crumbs form. Set aside.

Cranberry-orange cake Preheat oven to 350 degrees. Spray an 8×8-inch pan with non-stick spray then line with parchment paper and lightly spray again. In a medium-size bowl, whisk together flour, baking powder, baking soda, and salt. In the bowl of an electric mixer, cream butter, sugar, and orange zest until light and fluffy, about 3 minutes. Add eggs and vanilla extract, mixing until combined. Add dry ingredients, alternating with sour cream in three additions, starting and ending with the flour mixture. Stir in both kinds of cranberries.Spread batter evenly into prepared pan and top with crumb topping. Bake for 55-60 minutes, rotating once halfway through. Cake is done when top is set and toothpick inserted in the center comes out clean. Let cool completely. Carefully turn out of baking pan onto a platter.

Orange glaze In a small bowl, whisk together the powdered sugar and orange liqueur. You can substitute freah orange juice for the booze. Drizzle over completely cooled cake.

Saturday, August 24, 2019

Strawberry Shortcake in Cake Form

When my dear friend requests a birthday cake and then says strawberry shortcake is her favorite, I get to work. There are basically three elements: a great sponge cake or genoise for the layers; a strawberry filling; and stabilized whipped cream. For the cake layers I go to my baking mentor Susan Purdy for a great recipe I'm very familiar with. It's from Pie in the Sky the high-altitude cookbook I helped her with, back when I lived in Santa Fe. (Even though it's mainly for high altitudes, the book also includes a version of every recipe for sea level — that's what I used here.) It's a foolproof recipe which requires carefully following the explicit instructions and using many bowls, but it's totally worth it. The cooked strawberry filling is pretty basic but the inclusion of a little Yuzu juice keeps it very fresh and not too sweet. The whipped cream which frosts the outside is held a bit firmer with the inclusion of folded-in melted and cooled white chocolate with a little heavy cream in it. Then you just put it all together — it's divine! Of course, this would be fabulous with a cooked peach filling and almond scented whipped cream, or cherry filling and a chocolate Genoise. The possibilities are endless!


Ingredients for genoise
1 1/2 cups plus 1 tablespoon sifted cake flour
pinch salt
6 large room temperature eggs separated
1/2 teaspoon cream of tartar
1/2 cup plus 1/2 cup granulated sugar divided
1 teaspoon vanilla extract
1 teaspoon orange extract
1 teaspoon lemon extract
2 tablespoons plus 1 teaspoon grated citrus zest (your choice)
6 tablespoons melted and cooled unsalted butter

Procedure
Preheat oven to 375 degrees. Prepare two 9 inch cake rounds with non stick spray, line the bottom with parchment, re-spray, flour pans, and tap out excess flour.

Sift flour and sugar into small bowl and set aside. Put egg whites in bowl of electric mixer,  add cream of tartar, and whisk until foamy on medium speed. Gradually whip in 1/2 cup granulated sugar increasing mixer speed to high. Whip until stiff peaks form and when you raise up the whisk the egg white peak stands firm and tall and glossy. Carefully, with a rubber spatula, remove the egg whites into a medium size bowl and, without washing the eggy bowl, return to mixer stand and add egg yolks and remaining 1/2 cup sugar and whip until mixture thickens and lightens in color. Then add the extracts and zest and continue mixing at a high speed until it forms a ribbon as the batter drips off the whisk (which will take between 5-7 minutes, depending on your mixer). Now it's time to combine parts. Start by folding 1 cup of whipped egg whites into the yolks carefully with a good rubber spatula. Then alternately fold the flour mixture and the whites into the yolk mixture. Once everything is combined, remove 1 cup of batter and put into a small bowl. Fold the melted and cooled butter into the batter and then incorporate the batters together with yet more folding.

Using a spatula, divide batter between 2 pans and place on middle rack in oven. Bake for 20-25 minutes, until top is golden brown and it springs back when touched. Let cool. Can be made ahead of time and frozen.

Ingredients for strawberry filling
2 cups strawberries, cut into quarters
1/4 cup Yuzu (or lemon) juice
1 cup granulated sugar
2 tablespoons cornstarch stirred in 1/4 cup cold water

Procedure
Combine the berries, sugar, and juice in a sauce pan and cook over medium heat about 10 minutes, or until the berries create a nice bit of juice and get tender. Do not overcook, you want to see the pieces. Then taste for sweetness — you can add more sugar or more juice to your taste. Mix the cornstarch with the water just to make a paste and stir it into the boiling berries. Cook another few minutes so cornstach flavor cooks out. If it's too thick, add a splash of water and then let cool.

Ingredients for whipped cream frosting
2 cups heavy cream
1/2 cup white chocolate chips
1 teaspoon vanilla extract
1 cup confectioner's sugar

Procedure
In the top of a small double boiler, melt chocolate chips with 2 tablespoons of heavy cream over low heat, stirring with a rubber spatula. When everything is melted and combined, remove from heat and set aside to cool. In bowl of electric mixer, whip heavy cream until it is soft but thick. Sprinkle in confectioner's sugar and vanilla and whip a bit more. Then add melted white chocolate mixture and mix until thick. Watch closely, as over mixing can cause it to separate. Refrigerate until ready to use.

Assembly
I like to brush the cake layers with a little simple syrup to keep them moist (this is optional). Simple syrup lives up to its name — it's just equal parts of sugar and water which is boiled a few minutes until sugar dissolves and mixture is clear. You can also add some rum or Grand Marnier if you want to add another layer of flavor ... or even coffee. So place the first cake layer on a flat plate and put some of the whipped cream in a pastry bag and pipe a tube around the edge of the cake to keep the strawberry filling in place then put half the filling on top of first layer and smooth it out. Next top it with the second cake layer. Repeat the edge piping and berries. Then take the whipped cream in a pastry bag with a star tip and make festive little stars in rows up the sides and eat all of it. Happy end of summer!


Monday, August 19, 2019

Grilled Pineapple Tofu Cheesecake — a vegan dessert for everyone!

Seasonal Recipe of the Week
I have been working on some great new recipes I want to share. There are some great natural substitutes on the market which enable me to do yummy baking for the vegans in our lives. In particular, egg substitutes, which make baking possible. I also love to use cashews soaked in water overnight to make an amazing cream, add a little sriracha and you have a killer pasta sauce — BAM! But I digress, back to baking. This recipe combines silken tofu, cashew cream, banana, coconut oil, and pineapple to make a super delicious pie, even your carnivore eaters will love. Gotta soak those cashews overnight, so plan ahead! Makes one 8-inch cake.

Ingredients for crust
1 1/4 cup finely ground graham cracker (or any vegan cookies)
3 tablespoons sugar
4 tablespoons melted coconut oil
2 tablespoons almond milk

Ingredients for filling
1/2 cup raw cashews, soaked in water overnight
1/2 cup mashed ripe banana
14 ounces silken tofu, drained
2 tablespoons coconut oil, room temperature
2/3 cups sugar
4 teaspoons cornstarch
1/4 teaspoon fine sea salt
4 tablespoons fresh pineapple juice
Grated zest of 1 lime

Grilled pineapple slices for garnish
2 tablespoons toasted coconut for garnish

Procedure
Preheat oven to 350° and lightly spray an 8-inch springform pan with nonstick cooking spray.

To make the cookie crust, place the cookies in your food processor and pulse until you get fine crumbs. In a medium mixing bowl, stir together the cookie crumbs and sugar. Drizzle in the melted coconut oil and mix well to ensure the crumbs are moist. Pour in the almond milk and stir again to combine all ingredients. You might need to use your hands to blend the mixture to get a crumbly dough. Pour the crust mixture into the springform pan and press very firmly into the sides of the pan first and pat into the bottom. Bake for 10 minutes until firm. Remove from oven and place and let the crust cool completely before filling.

To make the filling, drain the soaked cashews and tofu. Add the cashews, mashed banana, tofu, coconut oil, sugar, cornstarch, sea salt, pineapple juice and lime zest to a blender and whizz until completely smooth and there aren't any small bit of cashew. Pour the batter over the crust and tap it lightly on the counter to get rid of any large air bubbles. Bake the cheesecake about 50 minutes, until the edges are golden and the top is lightly puffed and still looks a bit wet. Cool cake completely before adding the topping.

To decorate, cut thin rounds of fresh pineapple, remove center rind with small ring cutter. Grill in a very hot dry pan to get blackened marks. Let cool, then place rings on top of cake. Sprinkle with toasted coconut. Refrigerate cake overnight for best results.

Sunday, August 18, 2019

Flan — why mess with the classics?


One of my favorite desserts is a simple flan (or crème caramel, if you're French). Yes, you can alter the flavorings, add some citrus, or some herbs (thyme, lavender, lemon verbena, etc.) but how about just leaving it alone and making it perfectly? (Okay, maybe add an edible flower on top.) You can't beat that! This makes 6 servings

Ingredients
1 3/4 cups heavy cream
1 cup full-fat milk
pinch salt
1/2 vanilla bean, split lengthwise with seeds scraped out and saved
1 cup sugar
1/3 cup water
3 large eggs
2 large yolks
7 Tablespoons sugar

Procedure
Preheat oven to 350 and position rack in the center of the oven. Combine cream, milk and salt in a medium-size sauce pan. Add the vanilla seeds and the scraped vanilla bean pod. Bring to a simmer over medium heat then shut off and let steep for 30 minutes. Remove the vanilla pod.

Meanwhile, combine 1 cup sugar and the water in a small sauce pan and cook until sugar liquifies and turns a deep amber color. Be careful, if it gets too dark it gets real bitter, which nobody wants! Carefully pour about a tablespoon of this hot caramel into the bottoms of six 3/4-cup ramekins and swirl around to cover bottom. Set ramekins into a large roasting pan (13 × 9 × 2 inches).

Whisk eggs, egg yolks, and 7 tablespoons of sugar in a medium bowl until blended. Gradually and gently, whisk cream into egg mixture. Strain the egg mixture into a large measuring cup and carefully divide mixture among the ramekins. Open the oven door, pull the rack partially out to make the filling process easier. Now add very hot water into the pan, until the water level is halfway up the ramekins. Be careful not the splash water into the ramekins! Then slowly push the pan onto the rack then into the center of the oven.

Bake until centers are set and are jiggly, about 40 minutes. Remove from water bath and let cool, then refrigerate covered overnight.

To serve, run a small sharp knife around the edge, cover with a plate, give a little shake and turn over. If all is right with the world the flan will fall out onto the plate covered with a nice pool of caramel. And you will be a superstar.


Tuesday, July 30, 2019

Lemon Cake — a blast from my past!


When I was young and had lots of free time, I developed my love of baking and cooking by working with my father in the kitchen. He was an amazing and intuitive cook and could remember flavors like some people remember places. But he did not like the feel of flour and never really got into baking — just eating — so that's when I started doing my own research and development. Clipping recipes from the NY Times, buying cookbooks and just making stuff up. This is also when I started my yearly tradition of making a small gift cookbook for my friends. I did it for many years, some years producing over 70 copies. This was when I was at the mercy of Kinkos! Oh the hours spent waiting and collating. Unfortunately, my busy schedule has prevented me from making these gift books in the past few years, but who knows? maybe this year I will get back to business.

This recipe for a simple — and rather delicious — lemon cake is from my first cookbook home-published in 1975 called Stacy's Occasional Eats which had 10 recipes typed by my mother Bernice and a silk screened cover. I think you can never go wrong with a lemon cake and everything you need to make it is probably in your kitchen right now! So give it a go, and remember the lemon can be exchanged for lime or orange or tangerine with delicious results!

Ingredients
1 cup sugar
6 tablespoons butter, room temperature
1 tablespoon lemon zest
2 eggs
1 1/2 cups AP flour
1/4 teaspoon salt
1 teaspoon baking powder
1/2 cup milk
1/4 cup sugar
juice of 1 lemon

Procedure
Preheat oven to 325. Grease a 9 × 5 × 3-inch loaf pan. In a large bowl, cream butter and sugar till fluffy. Mix in eggs one at a time. In separate bowl, sift flour, baking powder, and salt. Add alternately to sugar butter mixture with milk beginning and ending with flour. Scrape down sides of bowl throughout the mixing process. Pour into loaf pan and smooth out top. Bake for 40-45 minutes or until toothpick inserted in cake comes out clean and top is golden brown.

While cake rests, in small saucepan combine the remaining 1/4 cup sugar with the lemon juice and cook till sugar dissolves. Poke a number of toothpick holes in the cake and pour mixture slowly on top of the cake till it all soaks in. Let it cool completely in pan, then remove.

That's it, super easy. Whipped cream doesn't hurt!

Saturday, April 20, 2019

Fussy French Macarons


Seasonal Recipe of the Week
I have always heard that making French macarons is very difficult. Four simple ingredients, how complex can it be? Well it turns out to be true! I assumed the reason people failed was that they did not follow the instructions carefully enough. Being a pretty experienced baker who is very good at reading and following a recipe, I decided to give it a go last night. I prepared myself by watching 6 different videos on the "fool proof methods" people use to achieve the proper texture, surface, feet, and flavor we all know and love. Six recipes, six different methods, six times I was annoyed and confused. I decided to try 2 different recipes, one from the Tasty website and one from the ex-con herself, Martha Stewart. One took 2 hours to make (including the resting and drying time) one took 15 minutes to make, same ingredients, different results. In the end I have combined methods from all the recipes I read and created my own method using basically Martha's recipe but not her technique. One of the most important thing is to weigh out the ingredients in grams as it is much more accurate. I had just okay results (as you can see by the photos) but I learned so much each time I failed. I always say to master a new recipe you need to make it at least 3 times so I am going to do it again today and will post an update if it is noticeably better. One factor I need to mention is humidity, which greatly impacts the cooking of meringue which is what these cookies essentially are. Today it is 97% humidity and pouring, so I am factoring that into my potentially crappy results. All the recipe instructions agreed on one thing, after you fill them you have to refrigerate them for at least 24 hours before serving so it's too soon to say if all this fuss was worth it. I will keep you posted.


Ingredients
71 grams Almond flour (I used Trader Joe's)
117 grams confectioners sugar
1 pinch salt
2 large egg whites, room temperature (I used organic)
53 grams granulated sugar

Optional
2 drops gel food coloring of your choice
1/4 teaspoon vanilla or other extract or flavoring

Procedure
Preheat oven to 300 degrees with rack in lower third of oven. Take a piece of parchment the same size as your sheet pan and draw 3/4-inch circles in sharpie 1 inch apart. Turn it over so ink is on bottom and place on sheet pan.

Place almond flour and confectioners sugar in a food processor and pulse around 14 times to make a super fine texture. Pass the mixture through a fine mesh sieve to get out any big pieces. Whisk egg whites in electric mixer with a pinch of salt. Once foamy slowly sprinkle in the granulated sugar and whip till glossy and stiff peaks form. Add flavoring (extracts or flavored oils) and food coloring, if desired, and beat on highest for speed 30 seconds.

Add dry ingredients in three additions carefully folding from bottom over the top then turning the bowl. This will probably take about 40-45 folds. Then you need to press some of the air out of the batter by pushing it against the side of the bowl and turning. You know the batter is correctly mixed when you can let it fall off the spatula and it ribbons enough so you can make a figure eight with the batter which dissapears after 30 seconds. The batter should look like shiny flowing lava.

Transfer batter to pastry bag, remember it's pretty runny so it might come out of the bottom of the bag. My new trick is I fold up the bottom of the bag up and hold it with a bag clip until I am ready to start. Dab some batter (remaining in bowl) onto bottom corners of parchment so it does not lift when piping cookies.

Pipe batter onto rounds from the side so you don't end up with a nipple on the top (one of my mistakes). Tap sheets firmly against counter 2 or 3 times to release air bubbles. Then let sit for 60 minutes till a dull film forms over macaroons and when you touch them your finger does not stick.

Bake 1 sheet at a time, rotating halfway through, until risen and just set, 13 minutes. Let cool on rack. Pipe or spread filling on flat sides of half of cookies; sandwich with remaining half. Wrap in plastic and refrigerate for at least 24 hours. I don't know why but will know tomorrow! Below are some photos of my mistakes!

 
Left to right: rookie mistake, they are too close together; macarons are much too tall and they were piped incorrectly.

Some closing notes: It's very confusing figuring out which recipe and which techniques to trust. I always look for a recipe which comes from a well-known source and one which has been tested and the notes are added to the recipe. Remember weather will always be a factor, if it's crazy hot or crazy dry that affects time of cooking and possibly temperature. And finally I always give myself at least 3 tries to get it right. After that I just go to the movies!

Wednesday, September 12, 2018

Holiday Honey Cake

Seasonal Recipe of the Week
Last week, Bernice enjoyed a lecture and tasting at her senior center about the amazing healing powers of eating local honey. When I heard this, I said get me some please! Today my mother brought me a beautiful little jar of this golden goodness which I immediately turned into a Jewish holiday classic — honey cake. I love this recipe! My baking mentor Susan Purdy included it in her high altitude classic Pie in the Sky, which I helped her test. This recipe, with very little modification, works at every altitude and you don't even need to use an electric mixer. What makes it so great is the inclusion of espresso powder, which gives it real depth and also adds a slight twist on the spices. I leave out the ginger (I'm allergic) and use cinnamon, nutmeg, mace and cardamom. Feel free to alter it to make it your own. Shanah Tovah! (Happy New Year!)


Ingredients
3/4 cup very hot water
1 tablespoon espresso powder
1 cup honey
1 cup sugar
3 eggs
3/4 cup canola oil
2 1/2 cups AP flour
1/4 teaspoon baking soda
2 teaspoons baking powder
1/2 teaspoon salt
2 teaspoons cinnamon
1/2 teaspoon nutmeg
1/4 teaspoon mace
1/2 teaspoon cardamom

Procedure
Preheat oven to 350 degrees. Spray a 9x5x3-inch loaf pan with oil spray, line with parchment and spray again. In a large bowl, dissolve the espresso powder in the hot water and then stir in the honey until it is smooth. Next mix in the sugar, oil, and eggs using a whisk. In a separate large bowl, combine the flour, baking powder and soda, salt and spices. Make a well in the center of the flour and add the liquids. Using your whisk, stir until smooth. The batter will be thin. Pour into prepared pan and set in the middle of the oven. Bake for 60-70 minutes until the top springs back and a toothpick inserted in the center comes out clean. Let cool on rack 30 minutes then remove pan and let cool all the way. If you want to dress it up, you can cut it into layers and fill it with apricot jam or glaze it and top it with toasted almond slices!

Sunday, August 12, 2018

The Best Blueberry Muffin of All Time (IMHO)

Seasonal Recipe of the Week
Hello my peeps, yes it's been a while, but I'm back! Work has been taking up my entire life and basically killed me but now it's me time. Getting my juju back and starting to bake again, which I love! This is a recipe I recently developed (which I have been told is the best muffin ever) and of course can be used with a variety of fruit. The secret to the moistness and great texture is in the full fat Greek yogurt (so don't skimp). I promise to post more often, any requests?


Ingredients
2/3 cups granulated sugar
1 cup blueberries
zest of one lemon
1 teaspoon vanilla extract
2 room temp eggs
2/3 cup Greek yogurt
1/3 cup water
1/3 cup melted butter
2 cups all-purpose flour
1 tablespoon baking powder
1/2 teaspoon cinnamon
1/2 teaspoon salt
1 tablespoon turbinado sugar (like Sugar in the Raw brand)

Procedure
Preheat oven at 350. Line a muffin tin with paper liners. Mix the berries and lemon zest plus 1 tablespoon from the total sugar amount and let sit in small bowl. Combine sugar, water, yogurt, butter, vanilla and eggs. In separate bowl combine flour, powder, and salt. Mix everything together with a spoon and put in muffin cups and sprinkle turbinado sugar on top. Bake 25 minutes until top is golden and it springs back when touched. Remember, less is more when it comes to making muffin batter, don't over mix as it creates tough and rubbery muffins.

Monday, February 19, 2018

Chocolate Chip Cheesecake

Seasonal Recipe of the Week
Everyone should have at least one great cheesecake recipe in their repertoire. This is my new fave! I love the crust made from lady fingers (instead of the uninspired graham cracker crust) with the inclusion of espresso powder and chocolate chips. I love the addition of mascarpone instead of just cream cheese. And I love the chocolate chips in the cake which give your mouth something to do. Cheesecake is easy to prepare, but make sure you really whip the cream cheese because lumps are unacceptable! Making sure the ingredients are at room temperature helps them blend together more easily.


Ingredients
1 7-ounce packages crisp, Italian-style ladyfingers
6 tablespoons unsalted butter, melted
1 tablespoon instant espresso powder
1 1/4 cups semisweet chocolate chips, divided
1 1/2 lbs cream cheese, at room temperature
1 cup sugar
1 cup mascarpone cheese, at room temperature
1 teaspoon pure vanilla extract
1/4 teaspoon salt
3 large eggs, at room temperature
boiling water

Procedure
Position a rack in lower third of oven and preheat to 350 degrees. Wrap the outside of a 9-inch springform pan with foil and line the bottom with parchment paper.

Using a food processor, grind ladyfingers into fine crumbs. Add melted butter, espresso powder, and 1/4 cup chocolate chips then pulse until incorporated. Transfer the mixture to the prepared pan and press to form a crust halfway up the sides. Bake until set, 8 to 10 minutes, let cool. Lower the oven temperature to 325 degrees.

While the crust cools, beat the cream cheese using an electric mixer on high speed until fluffy, about 2 minutes. Gradually beat in the sugar at high speed until smooth. Beat in the mascarpone, vanilla and salt. Add the eggs one at a time, beating well after each addition. Stir in the remaining 1 cup of chocolate chips.

Set the springform pan in a roasting pan. Pour the mascarpone-chocolate chip mixture into the baked crust, then place the roasting pan in the oven. Pour enough boiling water into the roasting pan to reach halfway up the sides of the springform pan. Bake until the top is golden and the center is set but still jiggly, about 1 hour.

Let cool in the water bath for 15 minutes, then transfer the springform pan to a rack to cool completely. Refrigerate the cheesecake (still in the pan) for 6 hours or up to 2 days. Remove cheesecake from the springform pan and put on flat platter. You can decorate with some whipped cream with a little coffee liquor in it. Or melt some chocolate and do a little Jackson Pollock drizzle thingy.